Dockerfile
Storage
GPUX Storage
GPUX has native storage exposed inside the running container on a unix socket. The socket is passed through as a volume and located at /gpux_api. You can use it to upload or download a file from inside the container to be accessible outside. Any file uploaded will return the sha1 it hashes to.
# Download
curl --unix-socket /gpux_api "http://dontcare/api/file/download/$SHA1" --output source.blend
# Upload
SHA1=$(curl -s --unix-socket /gpux_api --data-binary @out.zip "http://dontcare/api/file/upload/" | jq -r '.sha1')
Persistent Storage
GPUX containers also have persistent storage mounted based on the signing public key of
the job. Currently persistent storage is node local and does not carry over between nodes.
The persistent storage is mounted onto /gpux_usr/, anything put in this folder will be
shared with all the containers running off the same public key on the same node, in real time.
Job local storage is mounted on /gpux_job/, this storage gets purged when the job is deleted.
caution
Persistent Storage and GPUX Storage is node local only. For now..
Port Forwarding
GPUX forwards ports using subdomain forwarding (similar to IPFS). To access port 8080 on job 061i6uku7ie62tg1 which
is on node node0.gpux.ai you would simply visit http://061i6uku7ie62tg1-8080.node0.gpux.ai. Note the http part
currently https is not fully supported (due to complexities of doublewild card certificates) but it will be in future.
caution
HTTPS for port forwarding is not fully supported. For now..
Cloudflare Tunnel
If we want to use HTTPS or the node is behind a firewall we can run an anonymous CloudFlare reverse tunnel.
Running
#install cftunnel
wget --no-verbose https://github.com/cloudflare/cloudflared/releases/latest/download/cloudflared-linux-amd64.deb \
&& dpkg -i cloudflared-linux-amd64.deb \
&& rm cloudflared-linux-amd64.deb

#run the tunnel and point it to port 8080 on localhost
cloudflared tunnel --url "http://localhost:8080"
Automatic Detection
Containers automatically pick up a running cloudflare tunnel if it starts within the first 30 seconds and set a key on the job details called cftunnel.
Standard Template
FROM ubuntu:22.04
ENV DEBIAN_FRONTEND noninteractive

RUN apt-get update && apt-get install -y wget locales apt-transport-https apt-utils \
    && apt-get clean && apt-get autoremove --yes

ENV LANGUAGE en_US.UTF-8
ENV LANG en_US.UTF-8
ENV LC_ALL en_US.UTF-8
RUN echo "en_US UTF-8" >> /etc/locale.gen && locale-gen

WORKDIR "/root"

#install cftunnel
RUN wget --no-verbose https://github.com/cloudflare/cloudflared/releases/latest/download/cloudflared-linux-amd64.deb \
    && dpkg -i cloudflared-linux-amd64.deb \
    && rm cloudflared-linux-amd64.deb

#install python
RUN apt-get update \
    && apt-get install -y python3 python3-pip \
    && apt-get clean && apt-get autoremove --yes

#setup init because cftunnel
RUN echo '#!/bin/bash' >> /start.sh \
    && echo 'cloudflared tunnel --url "http://localhost:8000" &' >> /start.sh \
    && echo 'touch imafile' >> /start.sh \
    && echo 'python3 -m http.server' >> /start.sh \
    && chmod +x /start.sh

CMD ["/start.sh"]
Save the above into a directory as Dockerfile.
podman build --tag gpuxdemo .
podman run gpuxdemo
#...
2022-06-15T17:13:53Z INF +--------------------------------------------------------------------------------------------+
2022-06-15T17:13:53Z INF | Your quick Tunnel has been created! Visit it at (it may take some time to be reachable): |
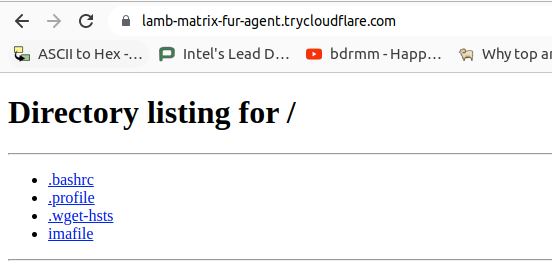
2022-06-15T17:13:53Z INF | https://lamb-matrix-fur-agent.trycloudflare.com |
2022-06-15T17:13:53Z INF +--------------------------------------------------------------------------------------------+
Now visit the tunnel URL.